Lunch Hack

Almost every day I eat the exact same thing for lunch.  Bagged Salad.  They are so versatile and easy! They can be thrown together in under 5 mins and can easily be made ahead of time. I sometime make up 3 or 4 salads in mason jars to get me through the week.   I don’t always have time to prep some exotic exciting and nutritious lunch so I rely heavily on these salads.

dsc_0536

The chopped variety are hands down my favorites.  I find they tend to hold up well when prepped ahead of time then the more delicate salad greens, and they offer different veggie combinations, instead of the standard romaine lettuce.  The sweet kale and Brussels sprouts variety is my absolute favorite.  It comes with chopped (actually it mostly shredded) kale, Brussels sprouts and cabbage with a poppy dressing and dried cranberry and pumpkin seed topping.  The cruciferous veggies (kale, Brussels sprouts and cabbage) supply a healthy amount of vitamin a, c, k and folate.  Also, when eaten raw like in this salad, they are high in sulforaphane. Sulforaphane is a potent phytochemical that research has shown to have a positive effect on cancer and certain neurodegenerative diseases.

I’ve been able to find these salads at my local grocery store, Target and Costco.  All different brands, but comparable in taste and nutritional breakdown. Obviously the Costco sized one is the largest, but I’ve never had a problem finishing it before it has gone bad.

I just add in my own protein and croutons (because a salad MUST have crunch). Most nights, when making dinner, I cook an extra serving of protein (chicken breast or thighs, pork chops, steaks, etc.) and then I use the left over protein for the next day’s salad.   When assembling the salads, I tend to use a higher veggie to dressing/topping ratio then the bag recommends. Helping keep the fat and sugar content lower.  So if the bag says it contains 4 servings, for me that is usually 2-3 servings of veggies, and I just save the dressing and toppings for another salad.

dsc_0543

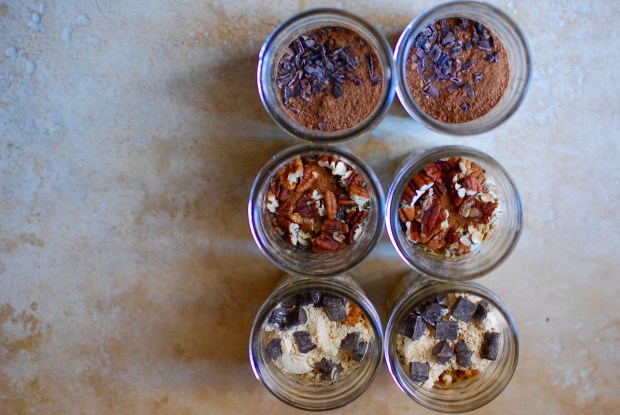
Mason jar salad for meal prep using bagged salad.

For meal prepping, layer these salads in a mason jar.  (Like I talked about here) First put the dressing in, then the salad mix (if using the hardier Brussel sprout and kale mix. If using more delicate greens, layer them last), next put in your protein, then top with the cranberries and seeds. Last but not least, put in whatever you need for crunch (I always add in 10 croutons).  Lunch is made! In under 5 minutes and if you meal prepped, it’s done for the week.


Make Ahead Mason Jar Lunches

Healthy lunches are hard when you are busy or not at home during the day.  It’s just too easy to run to the café or a nearby restaurant to grab something quick. So this week I have been I I would experimenting with some healthy lunches that you can make ahead of time.

dsc_0347

Mason Jar Cobb Salad

Food prep in mason jars has been all the rage lately.  My breakfast overnight oats in mason jars is one of my most popular recipes.  So I thought I would test some of these mason jar salads out and see if they held up to the hype.  Overall I was fairly impressed.   You can make a bunch on one day, vary the ingredients so you don’t get bored and they keep for a couple days in the fridge.

They last about 3-5 days in the fridge (to be honest, I feel 5 days is kind of stretching it. I would stick closer to 3.) The trick in making them is how you layer them. The order of ingredients is very important to keep everything delicious and not soggy.

Below are the basic instructions to making your own jars. By following these basic instructions, you can easily come up with your own versions. These are incredibly customizable and just like the overnight oats you can easily adjust for your own tastes.  I have also included a couple recipes I tested out below, a Cobb salad and a basic salad with quinoa.  (I am also testing out a zucchini noodle and quinoa salad.  If it is a success look for that recipe in a few days!)

You need wide mouth quart size mason jars. The pint size it just too small. The regular mouth could work, but it is just easier and less messy with the wide mouth.

  1. Dressing goes on the bottom. This helps keep the more delicate or absorbable ingredients from getting soggy.  Generally, I use 1-2 tablespoons.  But if you are dressing fanatic you can add more. Can adjust to your personal taste preferences.
  2. Layer the ingredients. After the dressing add the heaviest NON ABSORBANT ingredients, like carrots or cucumbers. Next add in any grains, beans or pasta. Then add in any cheese or protein. Next add in any soft veggies or fruit, like cut strawberries or avocado (if you are making these more than 24 hrs. ahead of time I would wait and add these the day of.) On top of these place any nuts, seeds or light grains (like quinoa! I layered the quinoa above the dressing in my recipe below and it ended up soaking up most of the dressing, so make sure you layer it up higher.) Last but not least, add the salad greens. When adding your greens, gently push everything down.  You want it fairly compacted to keep the layers mixing.
  3. Add perishables the day off. Things like avocado or fruit (or maybe hard boiled eggs) need to be added the day of (or at most the day before) I found in my experiments that anything more than 24 hrs. the avocado started to brown and the fruit started to break down.
  4. When it is time to eat: shake, shake, shake, shake it off. (sorry couldn’t help myself there). But seriously you need to really shake it up good.  Then pour onto a large plate or bowl and enjoy.  Technically you could eat it straight from the jar, but every time I did that I ended up making a huge mess. That might be my problem though.


After constructing the salads, tightly cap and store in the fridge.  When transporting them, try to keep them as up right as possible.  That will keep the dressing from mixing with the other ingredients.


Mason Jar Cobb Salad

Makes 2 quart jars

  • 2 Tb your favorite Ranch (I used Bolthouse)
  • 2 strips bacon
  • 10 grape tomatoes
  • ¼ cup grated carrots
  • ¼ cup sliced cucumber
  • 2 ounces avocado, diced
  • 2 large hard-boiled eggs, diced
  • 4 ounces cooked or grilled chicken breast, diced
  • 1/2 ounce blue cheese
  • 4 cups chopped romaine lettuce

Layer everything in the mason jar in the order listed above.  Pack it tightly and secure lid.  Will last 24 hrs. as is, if making ahead of time add the avocado and egg in no more than 24 hrs. in advance.  When it’s time to eat, shake it up really well and pour on to large plate.

nutrition:

calories: 357 fat:18 carbs:18 Protein: 30


Quinoa salad Jar

  • 1 Tb Vinaigrette*
  • ½ cup cherry tomatoes
  • ¼ cup garbanzo beans
  • 1.5 oz. grilled chicken breast
  • ¼ cup cooked quinoa
  • 1 hard-boiled egg, chopped
  • 1 oz. avocado
  • 2 cups salad greens

Layer everything in the mason jar in the order listed above.  Pack it tightly and secure lid.  Will last 24 hrs. as is, if making ahead of time add the avocado and egg in no more than 24 hrs. in advance.  When it’s time to eat, shake it up really well and pour on to large plate.

(In the pictures, you’ll notice I layered the quinoa right above the dressing.  I don’t recommend doing this.  The quinoa absorbed a lot of the dressing and got soggy.  By layering it up higher, it will stay dry and fluffy) *I used a basic homemade vinaigrette.

Nutrition:

Calories: 380 Fat: 11 carbs:39 Protein: 32


Stuffed Peppers with Quinoa and Turkey

The standard rice in this dish is replaced with the superfood quinoa.  While we eat quinoa like a grain it really is a seed. It is closely related to beets and spinach. Keep in mind it is covered in a bitter substance called saponins, so when you prep it make sure when you give a good rinse it first. Quinoa is naturally gluten free and decent source of protein, calcium, potassium, zinc, iron and vitamin E, hence why it gets to be called a superfood.

dsc_0316

Superfood Quinoa

By dicing the veggies small they are less likely to be picked out or noticed by the pickier eaters.  Keep in mind, though, bell peppers are a strong flavor and young palates may not eat them.  But that is ok, there are still 2 servings of vegetables hiding on the inside.  If you or any of your eater do not like feta you can leave it out completely, or just sprinkle it on top of some of the peppers.

You can make this dish any time of year, but it is fun to turn them into pepper-o-lanterns around Halloween! If you do carve them, do it before you stuff them and keep the oepenings small.  You may want to plan some extra time to make this; it takes about 30 minutes to prep and then another 30 in the oven.  (You can prep it ahead of time, and throw it in the oven at later point.  Just note it may need a little extra cook time if the peppers are cold from the refrigerator.)

dsc_0305

Stuffed Pepper-O-Lantern!

Stuffed peppers with Turkey and Quinoa

½ cup quinoa

1 cup chicken broth

6 bell peppers (any color you prefer)

1 Tb olive oil

2 cloves garlic, minced

1 small onion, chopped

1 small zucchini, diced

1 lb ground turkey.

2 tb Worcestershire sauce

½ tsp salt

½ tsp pepper

1 can fire roasted crushed tomatoes

1 Tb fresh oregano chopped

3 oz feta crumbled

Heat oven to 350. Combine quinoa and chicken broth in a saucepan. Bring to a boil, reduce and simmer for 15 minutes.  Quinoa is cooked once all the liquid is absorbed and they looked unwound.

Cut the tops of the peppers and set them aside. Remove the seeds and any white ribbing inside (If you are carving them, do that now.  Keep the openings small, you don’t want all the insides to fall out when cooking). Place peppers in a baking dish.  Discard the stems from the peppers tops and dice.

Heat oil in a skillet over medium heat. When hot, add garlic, onion chopped pepper tops, and zucchini. Cook till soft about 10 minutes.

Add turkey, Worcestershire, salt and pepper. Cook until meat is browned, about 8 minutes.  Add tomatoes and oregano.  Stir in quinoa and half the feta (if mixing inside the peppers.  If you have picky eaters, skip this and just top some of the peppers with it)

Fill peppers with meat mixture, and top with feta.  Cook for 30 minutes. Makes 6 servings.


Nutrition for one pepper: 291 calories, 12 grams fat, 24 carbs, 21 protein


Margherita Egg White Frittata

Recently I was gifted a very large bunch of basil and this recipe was born out of me desperately trying to come up with ways to use it before it went bad.  And I must say, it was a success.  I love basil, and there so many ways to use it other than pesto.  Basil isn’t just big on flavor; it also packs an amazingly healthy punch.  It is full of vitamin K, magnesium and potassium.  Also, research is showing the phytochemicals in basil can fight viruses, bacteria and inflammation.

dsc_0169

Now, to be honest, I did not test this recipe out on my children (I was hungry and not in the mood to share. Hey now, it happens.) But, I imagine most kids would like it.  I used all egg whites in the recipe, but feel free to sub in whole eggs (just note that will change the nutritional breakdown).

Due to the high protein content it is very filling while still being low in carbs (if you would like more carbs, some fresh fruit would go really well with it.) This frittata makes a great brunch or dinner.  Since does take a little attention and time, however, it is not the best choice for a rushed morning.


Margherita Egg White Frittata.

Serves 1

5 Oz Egg whites

3.5 Oz Grape tomatoes, sliced (any tomato will probably work here, this was just what I had on hand)

1 Oz Fresh mozzarella cheese

1 Tb Parmesan Cheese

2 Tb Basil, shredded


Place small skillet over medium heat and spritz with cooking oil.  Once hot, place tomato slices on skillet.  After a few minutes, pour egg whites over the tomatoes.  Once the sides begin to set, use a spatula to gently left the edges allowing the still liquid whites to run under.   As you lift the edge of the set egg, gently tip the pan so the uncooked egg can run underneath. Continue to do this till almost cooked through. It will still be a little raw in the middle.   Add mozzarella slices and over with a lid (keep an eye on it though, you don’t want it to burn).  Once the eggs are fully set turn over on to a plate and sprinkle with basil and parmesan cheese.  Enjoy!


Nutrition:

Calories: 192 Fat:6 Carbs:5 protein: 25

Chicken with strawberries, basil and goat cheese.

This protein packed recipe is  great when you are short on time. It is also family friendly.  My littles (age 5 and 2 love it).  The whole recipe takes only 30 minutes to throw together.  The combination of the strawberries, goat cheese and basil go really well together.  It’s easily adaptable to different family member’s tastes. For example, I leave the balsamic off my 2-year old’s plate, and I don’t add the goat cheese to the 5-year old’s.

Strawberries are a good source of vitamin C, A and K.  Make sure you choose berries that are dry and firm.  Smaller berries tend to have more flavor then the larger ones. Typically, the larger berries contain more water so, their flavor is diluted.

dsc_0286

While boneless skinless chicken breasts are a great lean protein source they can be tough to cook.  They easily become chewy or dry.  This is a quick cooking method, so there is less time for them to dry out. Make sure you do not use more than 1 tablespoon of oil when cooking them though.  It just needs to be enough to lightly cover the bottom of the pan. We are pan frying these guys, not deep frying! The easiest and cleanest way to pound the chicken is to place it in a gallon zip lock, and smack the crap out of it with a heavy skillet or pan.  Great way to get your aggressions out and the ziplock keeps all the chicken germs from flying around your kitchen.

dsc_0200

The Ingredients

4 Chicken breast, boneless skinless.

1 Tb cooking oil. (I like coconut oil)

Salt and pepper

2 Lbs green beans, washed and trimmed

1 Tb oil

3 cloves garlic, minced

kosher salt

black pepper

16 strawberries, washed hulled and chopped

2 Tb basil, chopped

2 oz goat cheese crumbles (feta would be great here too)

Balsamic vinegar

Preheat oven to 400. Trim the green beans.  Toss with oil and salt. Place on a cookie sheet/pan. (Make sure they are dry 1st).  Roast for 20-25 mins, shaking the pan every 10-15 mins.  They are done when wrinkly and brown in spots.

Meanwhile, pound the chicken thin.  You’ll want them to be uniform in thickness.  Heat oil in skillet to medium high.  Season chicken with salt and pepper. Once oil is hot, place chicken in skillet and cooked undisturbed for 3- 5 mins per side.  Let sit for 5 minutes.  (If you are making all 4 breasts, you may need to cook 2 at a time.  Do not crowd them in the pan)

To serve: Place chicken breast on top of 1.5 cups green beans and top with ½ cup chopped strawberries, ½ oz crumbled goat cheese, a sprinkle of basil and a drizzle of balsamic vinegar.


Nutrition (with 1.5 cups green beans, 4 oz chicken and ½ oz goat cheese):

Calories:377 carbs:16  fat:14  protien:41

Tiny Balls of Energy

My oldest son (age 5) and I made these recently for our mom and son time.  We made 2 flavors, a “regular” kid friendly chocolate chip and a mom inspired pumpkin spice. I had wrongly assumed that the pumpkin spice ones would be all mine, however, they ended up being a hit with everyone.

dsc_0302

Dark Chocolate Chip and Pumpkin Spice Energy Balls

These balls are a delicious and portable snack, while still managing to pack a healthy punch.  The oats, flax and pumpkin are full of healthy carbs and fiber, that helps to keep you feeling satisfied and providing fuel for your day. Not to mention the pumpkin provides lots of micronutrients, like vitamins A, E, C, K and potassium and magnesium.

Now, don’t freak when you see the fat content. There is a healthy dose of monounsaturated and omega-3s (aka healthy fats) from the pumpkin seeds, flax, chia and nut butters. We need healthy fats in our diet. Look for an article later discussing the importance of healthy fats, but the short of it is: there are many body tissues (hello, our brain!!) made up of fat. (EDIT: updated article on Fat is here.) This makes the type of fat we consume pretty important.

Pair these bad boys them with some lean protein (maybe some cottage cheese? Or how about a latte with skim milk?) and you have a nice balanced snack.

The Pumpkin Spiced Energy Balls

  • 1 1/2 cups Oats (Use old fashioned or Rolled.  Do not use instant or quick)
  • 1 cup Pumpkin (look for pure pumpkin, not pie filling. I like Libby’s brand, it doesn’t taste as vegetal)
  • 2 Tb Unsweetened Shredded Coconut, toasted
  • 6 Tb Ground Flax Seeds*
  • 1/3 cup Maple syrup (Use the real stuff!)
  • 1/3 cup Natural Peanut Butter
  • 1 tbsp. Vanilla extract
  • 1 tbsp. Chia Seeds
  • 1/2 tsp Cinnamon
  • 1/2 tsp Pumpkin pie spice
  • 1/2 cup Dark Chocolate Chips
  • 1/2 cup Pumpkin Seeds

Mix all ingredients.  Then place in fridge for ½ hour.  After they have gotten nice and chill, roll into balls.  Place on a cookie sheet lined with parchment and freeze.  Once frozen, transfer them to whatever you plan to store them in (I use a freezer baggie)

I keep them in the freezer and defrost what we plan to eat. They defrost quickly and will keep for probably 1 week in the fridge.

Makes about 20-24 balls (depending on the size and how much sampling happens.) *Depending on the consistency of your Peanut butter you may need more or less ground flax.

Nutrition info:  Calories: 153 Fat:9 Carbs: 15  Protein:6

Pumpkin Spice not your thing? No problem! Try this regular chocolate chip variety.

Chocolate Chip Energy Balls

  • 1 cup Old Fashioned Oats (again no quick or instant here)
  • 2/3 cup Unsweetened Shredded Coconut, toasted
  • 1/2 cup Almond Butter
  • 1/3 cup Maple Syrup (use the real stuff!)
  • 1 Tb Vanilla Extract
  • 1/2 cup Flax Seed
  • 1/2 cup dark chocolate chip
  • 1 tbsp Chia Seed

Mix all ingredients.  Then place in fridge for ½ hour.  After they have gotten nice and chill, roll into balls.  Place on a cookie sheet lined with parchment and freeze.  Once frozen, you can transfer them to whatever you plan to store them in (I use a freezer baggie)

I keep them in the freezer and defrost what we plan to eat. They defrost quickly and will keep for probably 1 week in the fridge.

Makes about 20-24 balls (depending on the size and how much sampling happens.) *Depending on the consistency of your Peanut butter you may need more or less ground flax.

Nutrition: calories: 133 Fat:10 carbs:11 protein:3

Adapted from Clean Food Crush and Gimme Some Oven


Overnight Oats

dsc_0195

These oats are a huge hit. They are super easy (and I mean e-a-s-y) to make (hello, no cooking!) and they are a delicious way to get a nourishing breakfast, full of protein and fiber!  Just layer the ingredients in a small mason jar, shake and refrigerate. That’s it! They will be ready to eat in 12 hours and will keep for 3-5 days.  (However, you may need to add more liquid the longer they are in the fridge).  When ready to eat, just give a quick stir, add in any fresh fruit and sit down and enjoy! No need to heat them (though you could if you wanted).

On Sunday, I like to meal prep a large batch.  Usually at lest 2 of each flavor! Then they are ready to eat all week long.

Peanut Butter and Chocolate Chip

Seriously, this bad boy tastes like a cookie!  If you are not familiar with PB2 it is a defatted peanut powered, you can find it in most grocery stores now and on Amazon. (There are also different brands available, I think I saw one by Jif recently.)  Fairlife Milk is an ultra-filtered milk, so there is more protein, less sugar and no lactose.  It is carried near the regular dairy milk in most major stores.

  • 1/2 cup rolled oats
  • 1 tsp chia seeds
  • 1/4 tsp vanilla extract
  • 1 tsp maple syrup (use sweetener of your choice, honey, stevia. etc.)
  • 2 TB powdered defatted peanut butter (I use PB2)
  • 1/2 cup Nonfat Fairlife milk (can use any “milk” here, but Fairlife will offer the most protein. Just make sure what you choose is unsweetened)
  • and last but not least 1 Tb chocolate chips.

Banana Nut Overnight Oats.

These guys remind me of a nutty banana bread.  Make sure you don’t add the banana until right before you eat it.

  • 1/2 cup oats
  • 1 tsp chia seeds
  • 1/2 tsp vanilla extract
  • 1/2 tsp cinnamon
  • 1 tsp maple syrup (again use sweetener of your choice)
  • 1 Tb chopped walnuts (pecans work good here too)
  • 1/2 cup nonfat fair life milk.
  • When its time to eat it, top with 1/2 a chopped banana! And maybe some more nuts if you’re feeling it.

Chocolate Raspberry Oats 

dsc_0212

These guys are not sweet, but you can make them sweeter by increasing the sweetener, using cocoa instead of cacao or topping with chocolate chips. They do pack a healthy punch.  They are full of antioxidants and polyphenols from the raspberries and cacao.  As written they have 14 grams of fiber and 18 grams of protein.

  • 1\2 c. Oats (rolled, uncooked)
  • 1 tsp maple syrup (or sweetener of your choice)
  • 1 tsp chia seeds
  • 1 Tb Cacao powder
  • 1/2 cup Fairlife nonfat milk (use milk of your choice, just note it will have less protein)
  • 1 tsp cacao chip or chocolate chips for sprinkling on top.
  • 1/4 c raspberries, don’t add till ready to eat.


After you make a batch, let me know. What did you think? Which flavor was your favorite?